How To Lay Paving Slabs? Complete Guide
Paving slabs come in such a wide variety of colours and designs that there is something to fit any garden design. Read our step-by-step guide to laying Paving slabs.
If you’re planning a DIY project using paving slabs, such as laying a patio, garden walk, or driveway, you may want to keep some helpful tips and techniques in mind before you start.
How To Lay Paving Slabs? Complete Guide
1. Request Samples Before Making a Purchase
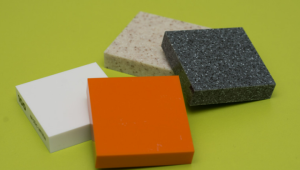
Before you begin paving, getting a few samples of various colours and paving slabs before investing in an entire patio is good. Although one colour or design may appear fine in an internet snapshot, differing weather, light, and adjacent landscape might suit various colours or styles better than others.
Before committing to anything, ordering a few samples to place in your garden over the artificial grass is preferable. You can observe various slabs in situ, in different lighting and at times of day in your garden and determine which matches yours best.
It’s simpler to alter your mind before anything is installed than to discover that you don’t like the colour after investing in the whole set of slabs!
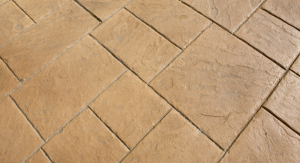
UK stone paving is one of our favourite slabs for any paving job. Not only is it actually stone, so it weathers well and is readily jet cleaned, but the irregular patterns give it a more sophisticated and modern appearance than typical square slabs.
2. Before You Go In, Have A Plan
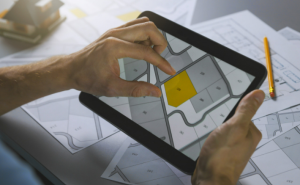
Using a construction line as much as possible is a good idea while planning out your space. Before excavating the required area, even before placing the slabs, it may give a clear guide to help you create a professional finish for your pavement.
To determine the number of slabs necessary, extend your constructing line to where you want the boundaries of your patio to sit before measuring the space to be covered. If you’re going to create a significant area for barbeques and entertainment, you may even set out your furniture on the lawn before drawing out the building line to ensure you allow enough room for the patio you want
3. Particularly If You’re Installing UK Stone Paving

UK stone paving is an attractive option – and although it may seem to be a bit difficult to install, you can easily do it yourself with the proper preparation. Instead of waiting until you’re ready to put down your slabs, it’s a good idea to lay them out in the form you want before connecting them to anything.
That way, you can readily see which slabs need to be cut before you begin, and you may experiment with the pattern before committing to a final solution.
Once you’ve placed your UK stone paving slabs in the position you want them to be, make a note of where each slab is lying. One method is to number the slabs on the bottom so you remember in which order to place them. Photographing the slabs and then creating a simple contour sketch that you can number and bring when laying out your UK Stone Paving Slabs may also be beneficial.
4. Before Placing Slabs, Make Sure Your Ground Is Well Prepared

Before laying out your slabs, you’ll need to prepare the ground, which includes more than just digging up the area they’ll need to go into; you’ll need a hardcore (also known as a sub-base) to sit at the bottom of your paving (usually made of limestone or sand), followed by your mortar, and finally your slabs.
TIP: Before putting down your hardscape, lay down a weed suppressant cloth to prevent weeds from sprouting up through it. It’s pretty cheap and can help keep weeds away for many years.
5. Make Your Slabs Slightly Slanted

If water does not drain correctly, it may sit on your patio and cause significant damage over time. Most specialists don’t tell you that to avoid this. It’s advisable to slant your slabs rather than maintain them entirely straight gently.
Create a measured slope using a builder line at the top and bottom of the hill, and then follow the angled line to ensure your slabs are laid on at an angle while avoiding uneven slabs that may constitute a tripping hazard.
6. Protect Your Patio During Construction
It’s no secret that the UK can be very wet – and creating a patio may take several days, increasing the risk of your project getting rained out before you’re completed.
To prevent extra moisture from entering the project before completion, specialists will cover the area with a weatherproof cover-up for construction work. It will guarantee the rain does not harm your measurements, supplies, or construction lines overnight!
7. Do Not Step on The Pavement Slabs

Once you’ve set down all of your paving slabs, don’t walk on them until the mortar is dry, which takes around 24-48 hours after you finish pointing. Avoid placing any weight on the slabs since it will cause them to shift and the surface to become uneven, causing slabs to misalign and creating a tripping hazard, not to mention destroying the professional appearance of your pavement.
If you have installed the pavement in a heavy traffic area and must walk on it before it is dry, it is advised that you lay a giant wooden board over the slabs before stepping over them to disperse your weight and limit any damage caused.
8. Finally, Apply A Seal

Another helpful idea is to seal the surface of your patio. Patio seals give further weatherproofing while reducing algae and moss growth on your pavement, making it simpler to maintain, like laying a decking. Wet-look pavement seals and satin finish paving seals are available to suit your preference. Another advantage is that paving sealants preserve your work and make it seem much more professional.
Conclusion
You mustn’t walk on your paving slabs for at least 24 hours after they have been set since this might cause them to slide and produce an uneven surface.
What is your reaction?